 Pin it
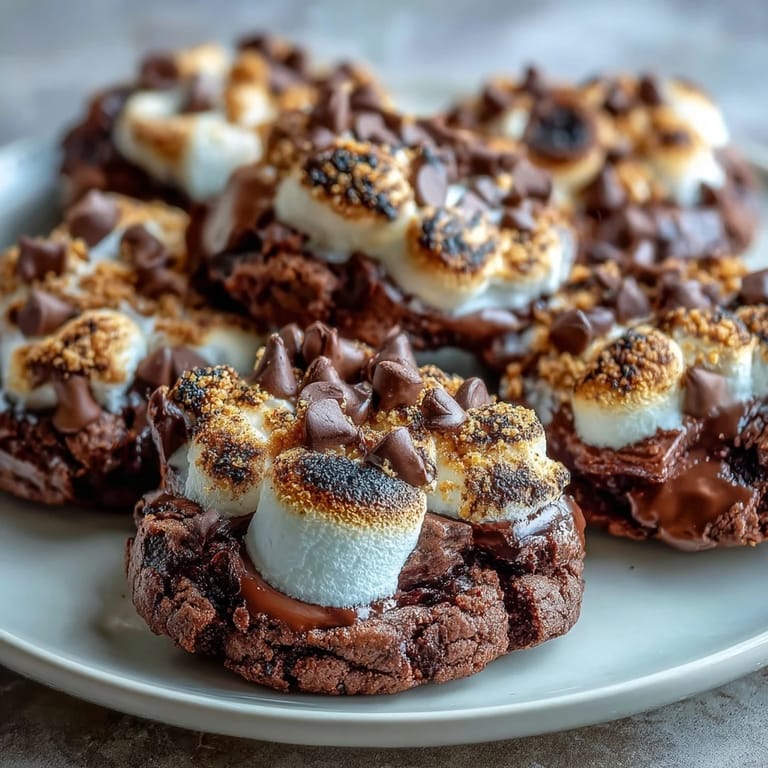
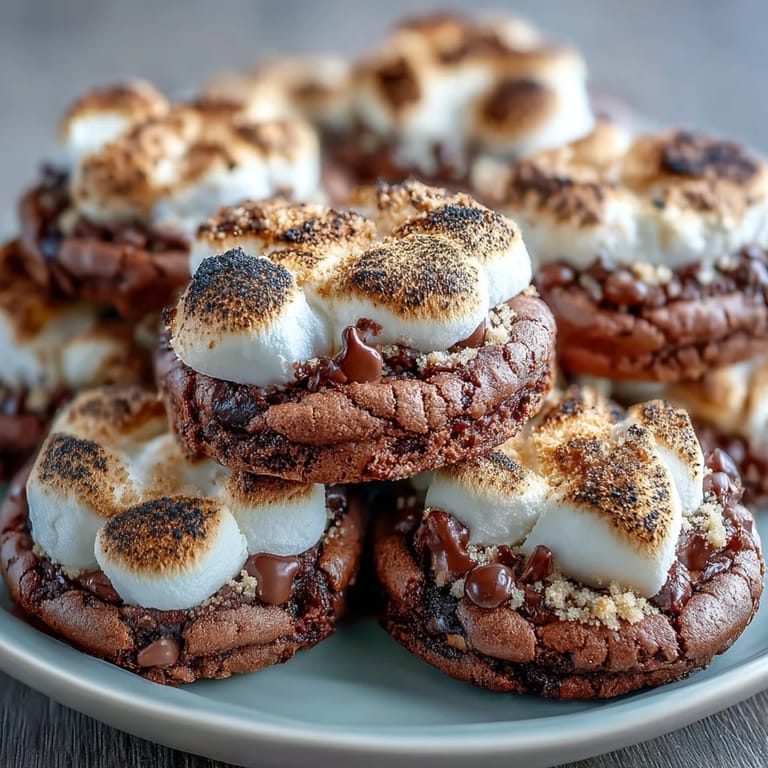
 My kitchen smelled like a campfire had moved indoors the first time I made these, and honestly, that's when I knew I was onto something special. These aren't your average s'mores tribute—they're chewy brownie cookies that taste like you've captured all that gooey, toasted magic without needing a backyard or a fire pit. The marshmallow melts right into the warm chocolate, and those graham cracker pieces add this subtle crunch that keeps you reaching for one more. I started making them on a whim one rainy afternoon, and now they're the dessert I sneak into coolers on road trips.
I baked these for a small gathering last summer, and watching people's faces when they bit through that toasted marshmallow top was absolutely worth the few extra minutes under the broiler. One friend actually closed her eyes and said it tasted like her childhood, which somehow made my silly kitchen experiment feel like something worth remembering. That's when desserts stop being just desserts and become moments that stick with people.
Ingredients
- Brownie mix (1 box, 18–20 oz): This is your foundation, and honestly, letting a box mix do the work means you can focus on the fun toppings instead of measuring cocoa powder and flour.
- Eggs (2 large): They're your binder, keeping everything together while the cookies stay soft and chewy in the center.
- Vegetable oil (1/3 cup): Oil over butter here means these cookies stay tender even after they cool—it's a small difference that matters.
- Water (1 tablespoon): Just enough to help the dry mix incorporate smoothly without overworking the dough.
- Semi-sweet chocolate chips (1/2 cup): These add pockets of melted chocolate throughout, and you can swap them for dark chips if you want a deeper flavor.
- Crushed graham crackers (1/2 cup): Toast a few sheets in a dry pan first if you want them crispier, but plain works just fine—they add that s'mores signature taste.
- Large marshmallows (18): One per cookie means everyone gets their toasted cloud, and buying the individually wrapped ones keeps them fresh.
- Mini chocolate chips and extra graham crackers (optional garnish): These are your finishing touch, the sprinkle of extra flavor that makes them look intentional and taste complete.
Tired of Takeout? 🥡
Get 10 meals you can make faster than delivery arrives. Seriously.
One email. No spam. Unsubscribe anytime.
Instructions
- Heat your oven and prep the stage:
- Set the oven to 350°F and line your baking sheets with parchment—this stops any sticking drama and makes cleanup feel effortless. The parchment is a small detail that changes everything.
- Mix the brownie base:
- Combine the brownie mix, eggs, oil, and water in a bowl, stirring until you don't see any dry streaks. Don't overthink it—a few gentle stirs is all you need, and you're already halfway to homemade-tasting cookies.
- Fold in the texture:
- Gently fold in the chocolate chips and crushed graham crackers, letting them distribute evenly so every bite has both. This is where you can taste a tiny piece of dough and know you're on the right track.
- Scoop and space:
- Using a heaping tablespoon, place cookie dough balls on the baking sheets about 2 inches apart—they'll puff up slightly, and you want room for that. If you don't have a cookie scoop, two spoons work just fine.
- First bake:
- Bake for 8–9 minutes, watching until the edges are set but the centers still jiggle slightly when you move the pan. This is the moment where soft cookies are born—don't overbake out of nervousness.
- Add the marshmallow:
- Pull the cookies out and immediately press one large marshmallow into the center of each while they're still warm. The residual heat will start softening them right away, and that's exactly what you want.
- Second bake for the melt:
- Pop them back in for 1–2 minutes just until the marshmallows puff up and start turning translucent around the edges. You're aiming for soft and gooey, not completely deflated.
- Toast if you're feeling fancy:
- For that authentic s'mores char, turn on your broiler and keep a close eye—30 seconds of broil time will give you golden-brown tops that taste like they came straight from a campfire. This step is optional but absolutely worth the attention.
- Garnish and cool:
- While everything is still warm, sprinkle mini chocolate chips and extra graham cracker crumbs on top if you're using them. Let the cookies rest on the baking sheet for 5 minutes before moving them to a wire rack—this lets the marshmallow set just enough without hardening completely.
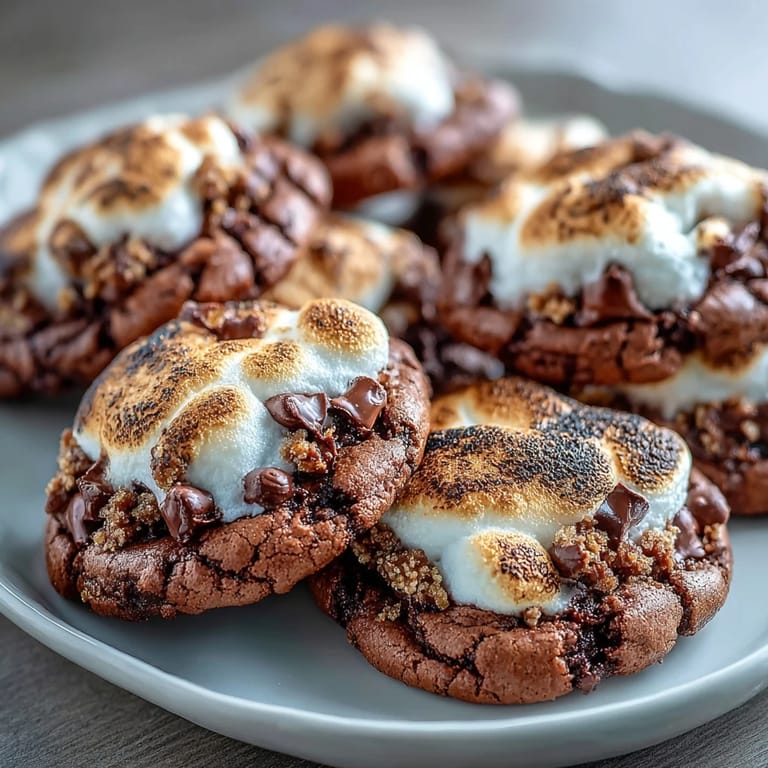 Pin it
 There's something almost ceremonial about this recipe, the way the kitchen fills with that toasted sugar smell and everyone gravitates toward the cooling rack. I've learned that these cookies taste better when someone's around to share them, because the joy of peeling back that warm marshmallow is always better with an audience.
Flavor Variations That Work
Once you nail the basic version, the fun really starts. I've added a pinch of cinnamon to the dry mix for a warmer spice note, and I've swapped semi-sweet chips for dark chocolate when I wanted something less sweet. One time I mixed in crushed pretzels instead of extra graham crackers, and the salty crunch against the marshmallow was unexpectedly brilliant. You can keep experimenting because the brownie mix is forgiving enough to handle a little creativity.
Making Them Look Restaurant-Quality
The secret to making these feel fancy instead of like a box-mix experiment is all in the finishing. That sprinkle of mini chocolate chips and graham cracker crumbs isn't just decoration—it signals that you actually cared about the details. A kitchen torch instead of the broiler gives you more control over that marshmallow toasting, and the flame-roasted look is honestly more impressive than you'd expect.
Storage and Make-Ahead Magic
These cookies stay soft and delicious in an airtight container for up to three days, though honestly they rarely last that long in my house. You can also make the dough ahead and refrigerate it, then scoop and bake whenever you want fresh warm cookies—perfect for when someone unexpected stops by or you're craving that campfire feeling. The marshmallow topping is best added fresh right before serving, but these are flexible enough to fit into a real, imperfect kitchen life.
- Keep them in a container with parchment between layers to prevent sticking and maintain that soft texture.
- If you're making the dough ahead, let it sit at room temperature for 5 minutes before scooping so it's easier to work with.
- Reheat a cooled cookie in the microwave for 15 seconds if you want that warm, gooey marshmallow feeling again.
 Pin it
 These cookies remind me that some of the best desserts come from combining things that already work beautifully together. Every time I make them, someone asks for the recipe, and I always tell them the truth—it starts with a box, but the magic happens in those last few minutes when you watch the marshmallow puff and the smell fills your whole kitchen.
Questions & Answers
- → How do I prevent the marshmallow topping from burning?
Keep a close eye when broiling and toast for only 30 seconds or until golden. Remove immediately to avoid burning.
- → Can I use dark chocolate chips instead of semi-sweet?
Yes, dark chocolate chips add a richer, slightly bitter contrast that complements the sweetness of the marshmallows perfectly.
- → What is the best way to store these cookies?
Store in an airtight container at room temperature for up to 3 days to keep them soft and fresh.
- → Is a kitchen torch necessary for toasting marshmallows?
A kitchen torch is optional. You can broil the marshmallows in the oven for a similar toasted effect.
- → How do graham cracker pieces affect the texture?
Adding crushed graham crackers gives a pleasant crunch and a subtle sweetness that enhances the chewy brownie base.