 Pin it
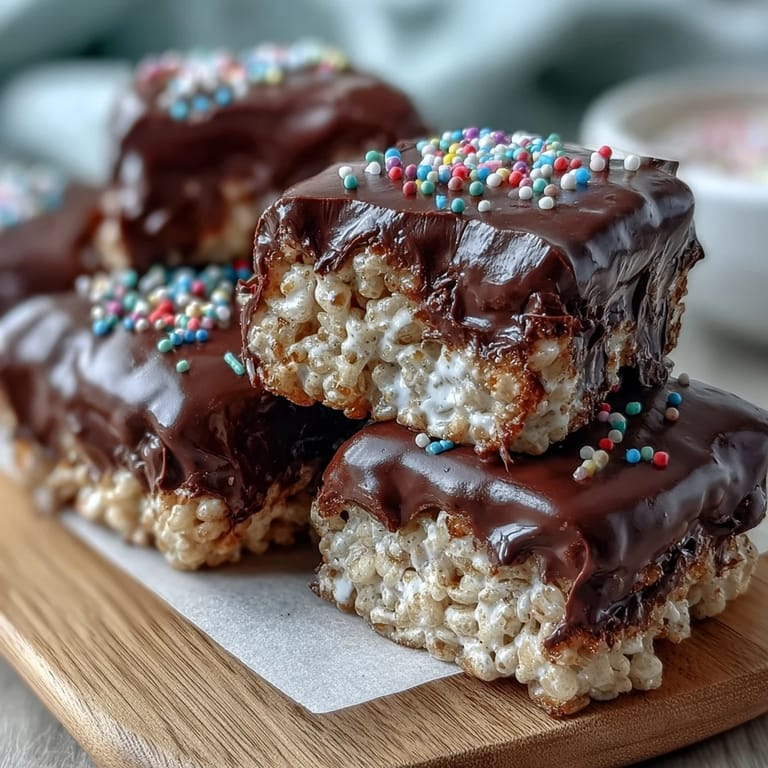
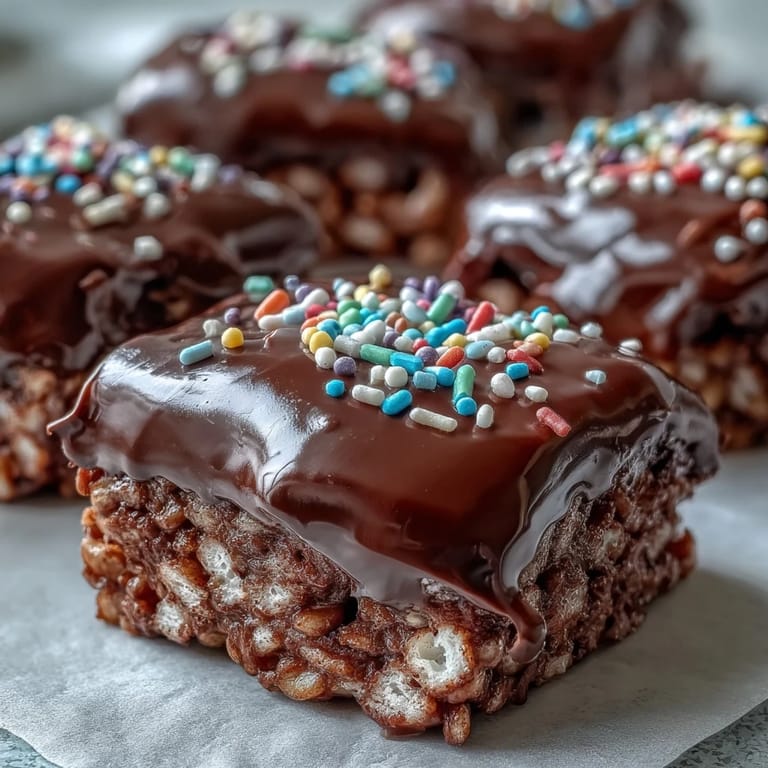
 My neighbor knocked on my door one Saturday holding a plate wrapped in foil, grinning like she'd won something. Inside were these thick, glossy chocolate-covered squares that crackled when I bit into them—crispy rice cereal bound with marshmallow and sealed under dark chocolate. She said her kids demanded them every birthday, and after tasting one I understood why. I made my first batch the following weekend and haven't stopped since.
I brought a tray of these to a summer cookout and watched them disappear before the burgers even hit the grill. My friend's toddler grabbed two at once, chocolate smudging her cheeks, while her dad admitted he'd already eaten three. Someone asked if I'd bought them from a bakery, and I just laughed and promised to share the recipe. That moment taught me that simple recipes executed well often outshine complicated ones.
Ingredients
- 6 tablespoons unsalted butter (plus extra for greasing): Butter adds richness and helps the marshmallows melt smoothly without sticking to the pan.
- 1 package (10 ounces) mini marshmallows: Mini marshmallows melt faster and more evenly than large ones, creating a uniform binding.
- 6 cups Rice Krispies cereal: The star ingredient provides that signature snap and airy crunch in every bite.
- ¼ teaspoon fine sea salt (optional): A pinch of salt balances the sweetness and makes the chocolate taste richer.
- 1 ½ cups semisweet or dark chocolate chips: Choose quality chips for a glossy finish that doesn't seize or turn grainy.
- 1 teaspoon vegetable oil or coconut oil: This small addition keeps the chocolate silky and spreadable, preventing it from cracking when you cut the bars.
- 2 tablespoons rainbow sprinkles or chopped nuts (optional): Garnishes add color and extra texture, turning simple treats into something festive.
Tired of Takeout? 🥡
Get 10 meals you can make faster than delivery arrives. Seriously.
One email. No spam. Unsubscribe anytime.
Instructions
- Prep the Pan:
- Lightly grease an 8x8-inch or 9x9-inch square baking pan with butter, making sure to coat the corners. If you line it with parchment paper, you can lift the finished block out cleanly for easier cutting.
- Melt the Butter:
- In a large saucepan over low heat, melt the butter while stirring constantly to prevent any browning. Low and slow is the key here.
- Add Marshmallows:
- Toss in the mini marshmallows and keep stirring until they melt into a smooth, glossy mixture. This should take about three to four minutes.
- Season the Base:
- Remove the pan from heat and stir in the sea salt if using. This is also when you can add a splash of vanilla extract for extra warmth.
- Fold in Cereal:
- Add the Rice Krispies cereal and gently fold with a spatula until every piece is coated in marshmallow. Work quickly before the mixture cools and stiffens.
- Press into Pan:
- Transfer the mixture to your prepared pan and press it down evenly using a buttered spatula or your hands. Firm pressure creates bars that hold together when you cut them.
- Let It Rest:
- Allow the base to sit at room temperature for about ten minutes so it firms up enough to support the chocolate layer. Don't skip this or the chocolate will sink in.
- Melt the Chocolate:
- In a microwave-safe bowl, combine chocolate chips and oil, then microwave on medium power in thirty-second intervals, stirring after each. Stop when the mixture is smooth and glossy.
- Coat the Top:
- Pour the melted chocolate over the cooled Rice Krispy layer and spread it evenly with an offset spatula or the back of a spoon. Work from the center outward for a professional finish.
- Add Garnishes:
- Immediately sprinkle with rainbow sprinkles or chopped nuts if desired. The chocolate sets quickly, so don't wait.
- Set the Chocolate:
- Allow the treats to set at room temperature for at least one hour, or refrigerate for twenty to thirty minutes until the chocolate is firm. Patience here prevents messy cuts.
- Cut and Serve:
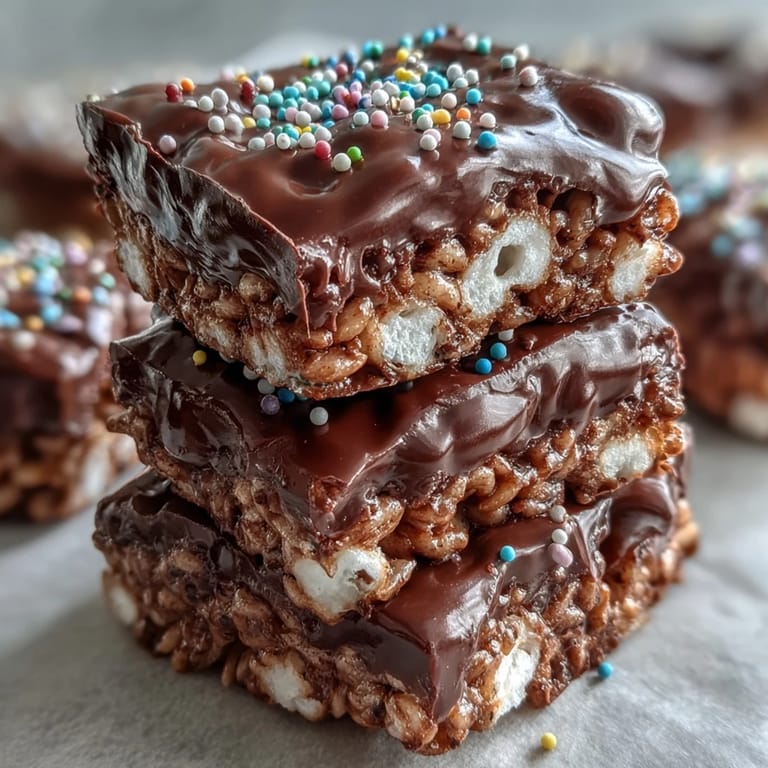
- Once set, lift the block from the pan or invert it onto a cutting board. Use a sharp knife to cut into twelve to sixteen bars, wiping the blade between cuts for clean edges.
 Pin it
 One evening I made a double batch for my daughter's school fundraiser, and by the time I delivered them, parents were already asking if I sold these regularly. A mom pulled me aside and said her son, who usually refused sweets, had eaten two bars and asked for the recipe. Moments like that remind me that food connects us in ways words sometimes can't.
Flavor Variations to Try
Once you master the base, experimenting becomes irresistible. I've stirred peanut butter into the melted marshmallows for a nutty twist, swapped dark chocolate for white chocolate and added dried cranberries, and even mixed in a handful of mini chocolate chips directly into the cereal for extra pockets of sweetness. My favorite variation uses espresso powder in the chocolate layer—just half a teaspoon transforms these into a grown-up treat. Each tweak opens a new flavor door, and you'll quickly find your household favorites.
Storage and Make-Ahead Tips
These bars keep beautifully at room temperature in an airtight container for up to three days, though they rarely last that long in my house. If your kitchen runs warm or you've used a softer chocolate, refrigerate them to prevent melting and pull them out fifteen minutes before serving. I've also frozen cut bars individually wrapped in plastic, then stacked them in a freezer bag—they thaw in about twenty minutes and taste just as fresh. Making them a day ahead actually improves the texture as the flavors meld and the chocolate fully sets.
Troubleshooting Common Issues
If your chocolate seizes and turns grainy, it usually means water got into the bowl—make sure all utensils are completely dry. When bars turn out too hard, you've likely overcooked the marshmallows or pressed too firmly. On the flip side, sticky, soft bars mean the marshmallows didn't melt long enough or the ratio of cereal to marshmallow was off. If the chocolate cracks when you cut, let the bars sit at room temperature longer or run your knife under hot water between slices.
- Use fresh marshmallows, as stale ones don't melt smoothly and create a gummy texture.
- Measure cereal by volume, not weight, since different brands can vary in density.
- Cool the chocolate slightly before pouring so it doesn't melt into the base or create a dull finish.
 Pin it
 These chocolate-covered Rice Krispy treats have become my go-to whenever I need something fast, foolproof, and guaranteed to make people smile. Whether you're feeding a crowd or treating yourself on a quiet afternoon, they deliver every single time.
Questions & Answers
- → How long do these treats stay fresh?
Store in an airtight container at room temperature for up to 3 days, or refrigerate for up to a week. The chocolate may develop a slight bloom if refrigerated but remains perfectly delicious.
- → Can I freeze these chocolate-covered bars?
Yes! Wrap individual portions in plastic wrap and freeze for up to 2 months. Thaw at room temperature for 30 minutes before serving.
- → What's the best way to cut clean squares?
Let the chocolate set completely at room temperature for 1 hour. Use a sharp knife warmed under hot water and wiped dry between cuts for clean edges.
- → Can I use white chocolate instead?
Absolutely! White chocolate creates a beautiful contrast and pairs wonderfully with pastel sprinkles for special occasions or holidays.
- → Why add oil to the chocolate?
The vegetable or coconut oil helps the chocolate melt smoothly and creates a glossy finish that sets firmly without cracking when you cut into the bars.