 Pin it
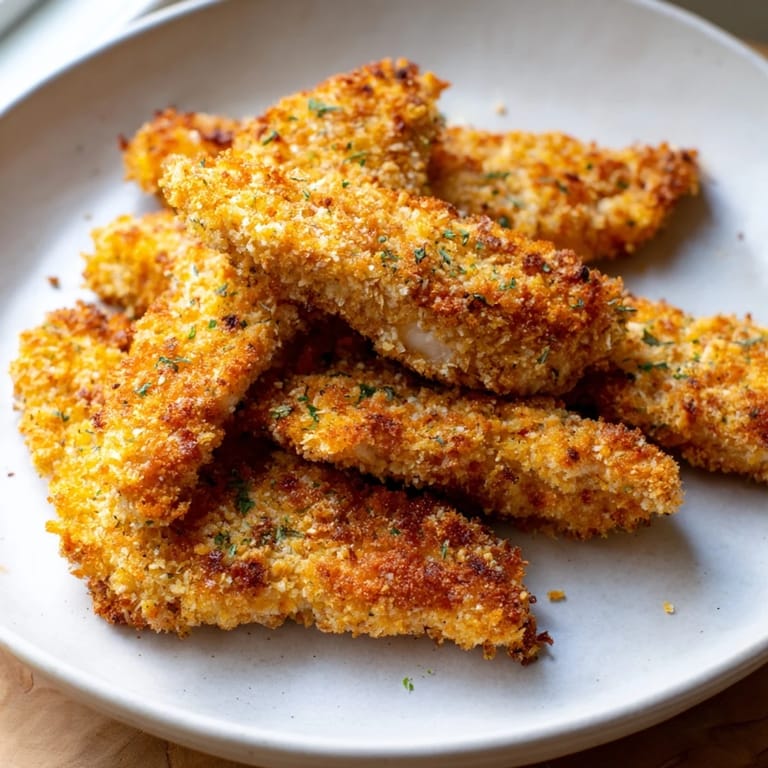
 My kids used to turn their noses up at anything that wasn't deep-fried, so I started playing around with panko in the oven one rainy Wednesday. The sound of that first bite, the crack of golden crust giving way to juicy chicken, had them asking for seconds before I even sat down. I never went back to the fryer. These strips come out so crispy, so perfectly golden, that even my picky seven-year-old now requests them for her birthday dinner. It's become our weeknight win, proof that you don't need a vat of oil to get that satisfying crunch everyone craves.
I made these for a neighborhood potluck last spring and watched as plate after plate came back empty. One friend asked if I'd brined them overnight, another swore I must have used a secret spice blend. The truth was simpler: good panko, a light hand with olive oil, and high heat. That night I realized this recipe had crossed over from weeknight convenience to something I could actually be proud to share. Now it's my go-to whenever I need to feed a crowd without spending hours in the kitchen.
Ingredients
- Boneless, skinless chicken breasts or tenders: Tenders cook faster and stay juicier, but breasts work beautifully if you slice them evenly into strips about three-quarters of an inch wide.
- Salt and black pepper: Simple seasoning on the raw chicken ensures flavor goes all the way through, not just on the surface.
- All-purpose flour: This first layer helps the egg mixture cling and creates a foundation for the panko to grab onto.
- Eggs and mayonnaise: The mayo adds richness and helps the coating stick better than eggs alone, plus it keeps the chicken moist as it bakes.
- Panko breadcrumbs: These Japanese-style crumbs are larger and airier than regular breadcrumbs, which is exactly why they bake up so crispy and light.
- Dried Italian herbs: A blend of oregano, thyme, and basil brings warmth and familiarity without overpowering the chicken.
- Garlic powder and smoked paprika: Garlic adds savory depth while paprika gives a subtle smokiness and that beautiful golden-orange color.
- Cayenne pepper: Just a pinch wakes everything up, but you can skip it entirely if heat isn't your thing.
- Olive oil: A light drizzle or spray before baking is the secret to triggering that deep golden crust in the oven.
Tired of Takeout? 🥡
Get 10 meals you can make faster than delivery arrives. Seriously.
One email. No spam. Unsubscribe anytime.
Instructions
- Preheat and Prep Your Pan:
- Set your oven to 220°C (425°F) and line a baking sheet with parchment paper, or even better, set a wire rack on top for air circulation. This small step makes a huge difference in how evenly the bottoms crisp up.
- Season and Slice the Chicken:
- Pat the chicken completely dry with paper towels, then cut it into strips about 2 cm wide, keeping them as uniform as possible so they cook at the same rate. Season both sides with salt and pepper right on the cutting board.
- Set Up Your Breading Station:
- Arrange three shallow bowls in a row: flour in the first, whisked eggs and mayonnaise in the second, and panko mixed with all the herbs and spices in the third. This assembly line makes coating fast and tidy.
- Coat Each Strip:
- Dredge a chicken strip in flour, shake off the excess, dip it into the egg mixture until fully coated, then press it firmly into the panko blend on both sides. Set it on your prepared pan and repeat with the rest.
- Oil and Bake:
- Drizzle or spray the tops of the coated strips lightly with olive oil, then slide the pan into the oven. Bake for 18 to 22 minutes, flipping halfway through, until the coating is deep golden and the internal temperature hits 74°C (165°F).
- Rest Before Serving:
- Let the strips sit on the pan for 2 to 3 minutes after baking so the crust sets and stays intact when you bite in. Serve them warm with your favorite dipping sauce on the side.
 Pin it
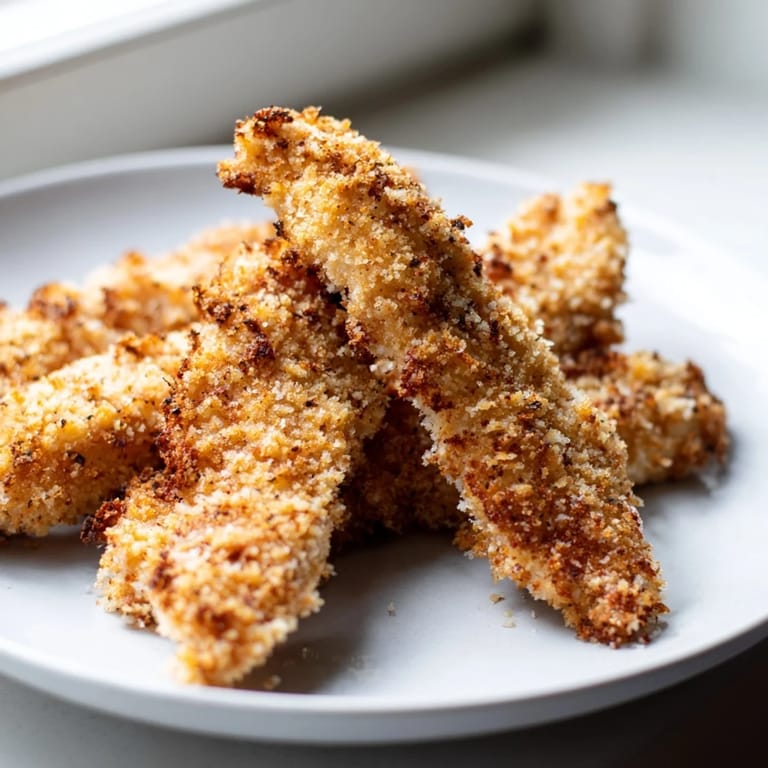
 There was one evening last fall when my husband came home late and reheated a few strips in the toaster oven. He said they tasted even better the second time around, which almost never happens with breaded chicken. That's when I realized this recipe had real staying power, not just in flavor but in texture too. It's rare to find something that holds up so well, and that makes it perfect for meal prep or intentional leftovers.
Serving Suggestions
I like to set out a few small bowls of different dipping sauces, honey mustard, creamy ranch, spicy sriracha mayo, and let everyone customize their plate. A simple green salad with lemon vinaigrette or a pile of roasted sweet potato wedges rounds out the meal without much effort. If you're feeding kids, carrot sticks and cucumber slices make it feel like a fun finger-food feast. For adults, a crisp Sauvignon Blanc or a cold lager pairs beautifully and keeps the mood light and easy.
Storage and Reheating
Leftover strips keep well in an airtight container in the fridge for up to three days, and they reheat surprisingly well in a toaster oven or regular oven at 180°C (350°F) for about 8 minutes. I don't recommend the microwave unless you're okay with soft breading, it just won't give you that crunch back. If you want to freeze them, let them cool completely, then layer them between parchment paper in a freezer-safe bag for up to two months. Reheat from frozen at 200°C (400°F) for 15 to 18 minutes, flipping once, and they'll taste almost freshly made.
Customization Ideas
You can easily swap the Italian herbs for a different flavor profile, try ranch seasoning mix, taco spices, or even everything bagel seasoning for a fun twist. Adding a handful of grated Parmesan to the panko gives it a salty, nutty richness that's hard to resist. For a gluten-free version, use gluten-free panko and a one-to-one flour substitute, the texture stays just as crispy. If you want a lighter option, Greek yogurt works in place of mayonnaise and adds a slight tang that complements the herbs.
- Toss the panko with lemon zest and fresh parsley for a bright, herby version that feels almost Mediterranean.
- Mix a tablespoon of hot sauce into the egg mixture if you want heat baked right into every bite.
- For meal prep, double the batch and freeze half before baking so you always have a quick dinner option ready to go.
 Pin it
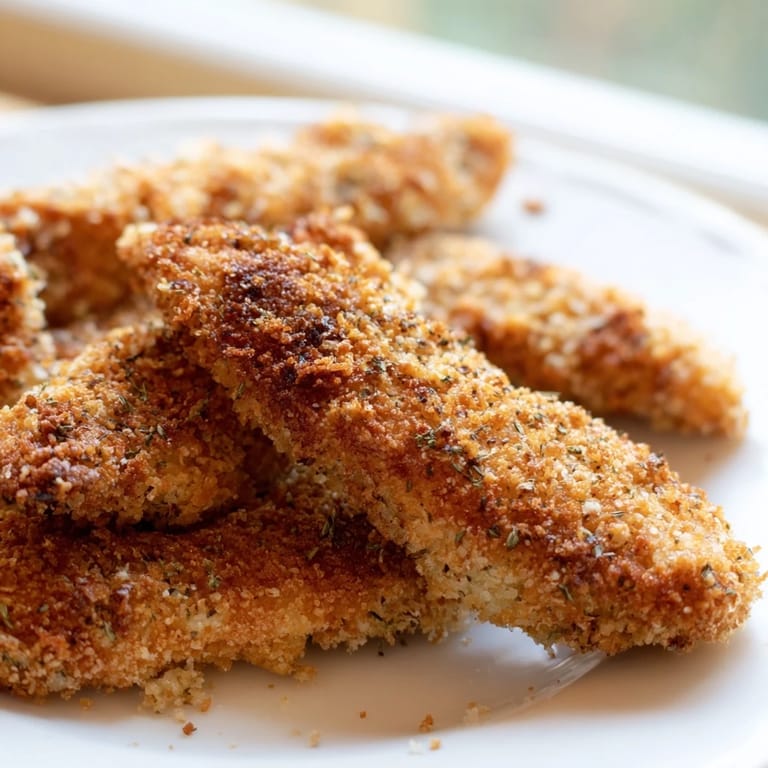
 These chicken strips have earned a permanent spot in our dinner rotation, not because they're fancy, but because they're reliable, delicious, and make everyone at the table happy. I hope they become one of your easy wins too.
Questions & Answers
- → How do I keep the panko coating crispy?
Use a wire rack on your baking sheet instead of a solid surface to allow air circulation underneath the chicken. Drizzle lightly with olive oil before baking and avoid crowding the pan. Let the strips cool for 2-3 minutes after baking to allow the coating to set completely.
- → Can I prepare these ahead of time?
Yes, you can bread the chicken strips up to 4 hours ahead and refrigerate on a baking sheet covered with plastic wrap. Frozen breaded strips can be baked directly without thawing—just add 2-3 minutes to the cooking time.
- → What's the best way to check if chicken is fully cooked?
Use a meat thermometer to ensure the internal temperature reaches 74°C (165°F) at the thickest part. Alternatively, cut into the largest strip—there should be no pink inside and juices should run clear.
- → How can I make this gluten-free?
Simply substitute gluten-free panko breadcrumbs and gluten-free all-purpose flour in the breading station. Ensure your mayonnaise doesn't contain gluten additives by checking the label. Everything else remains the same for the preparation method.
- → What dipping sauces pair best with these strips?
Honey mustard, classic ranch, spicy sriracha mayo, and garlic aioli are excellent choices. For a lighter option, try yogurt-based dips with herbs. The mild seasoning in the coating complements both creamy and tangy sauces.
- → Can I use Greek yogurt instead of mayonnaise?
Absolutely. Greek yogurt creates an equally effective binding agent for the breadcrumb coating while reducing fat content. It may slightly alter the texture of the coating, but the results remain crispy and delicious.